Disassembling the Kodak Charmera

I was given a Kodak Charmera for my birthday and fell in love with it. It’s wonderful to leave home without a phone, but still be able to capture moments and without being popped out of them!


I want to go even further; get it fast-booting into camera mode, customise the sounds & frames/filters, fix the EXIF tag writing, and anything else that gets the camera further out of the way (with the occasional bit of extra customisation fun!)
(I’ve already built a macOS tool which sits in the background and auto-imports your Charmera photos; using machine learning to auto-rotate based on content, fixes the EXIF data, and transcodes the videos to a modern, space efficient format. Check it out!)
Getting it open
Getting it apart is easy, but a little nerve wracking, as you need some force to unclog the two parts.
You’ll need a flat screwdriver to pry apart the plastic sides carefully (it didn’t break the tabs, and I think it’d be hard to do that).
The side nearest the viewfinder has a short ribbon cable between the main board on the front piece and the screen on the back, so don’t bring the two sides apart more than you need to on that side, and no more than ~1cm on the other. (Photos here soon!)
The ribbon connector on the main board side rotates away from the board to release the cable, so get a small screwdriver under the grey plastic side and lift to have the clasp pop and the cable released.
You’ll also need a watchmaker’s cross-head screwdriver to take off the two tiny screws to let you pull the PCB out. Be careful, there’s nothing holding the viewfinder plastic in! Mine has escaped containment, and I’ll likely find it again when doing a completely different project that happened to have its drawer open as I was prising this apart 😅
The main board
It’s delightfully small on the inside!
Here’s the “back” of the main board. Battery off to the left, and the speaker off to the right. (The speaker’s cables are extremely thin, be careful when extracting it from the case, don’t lift by them if you can avoid it!)

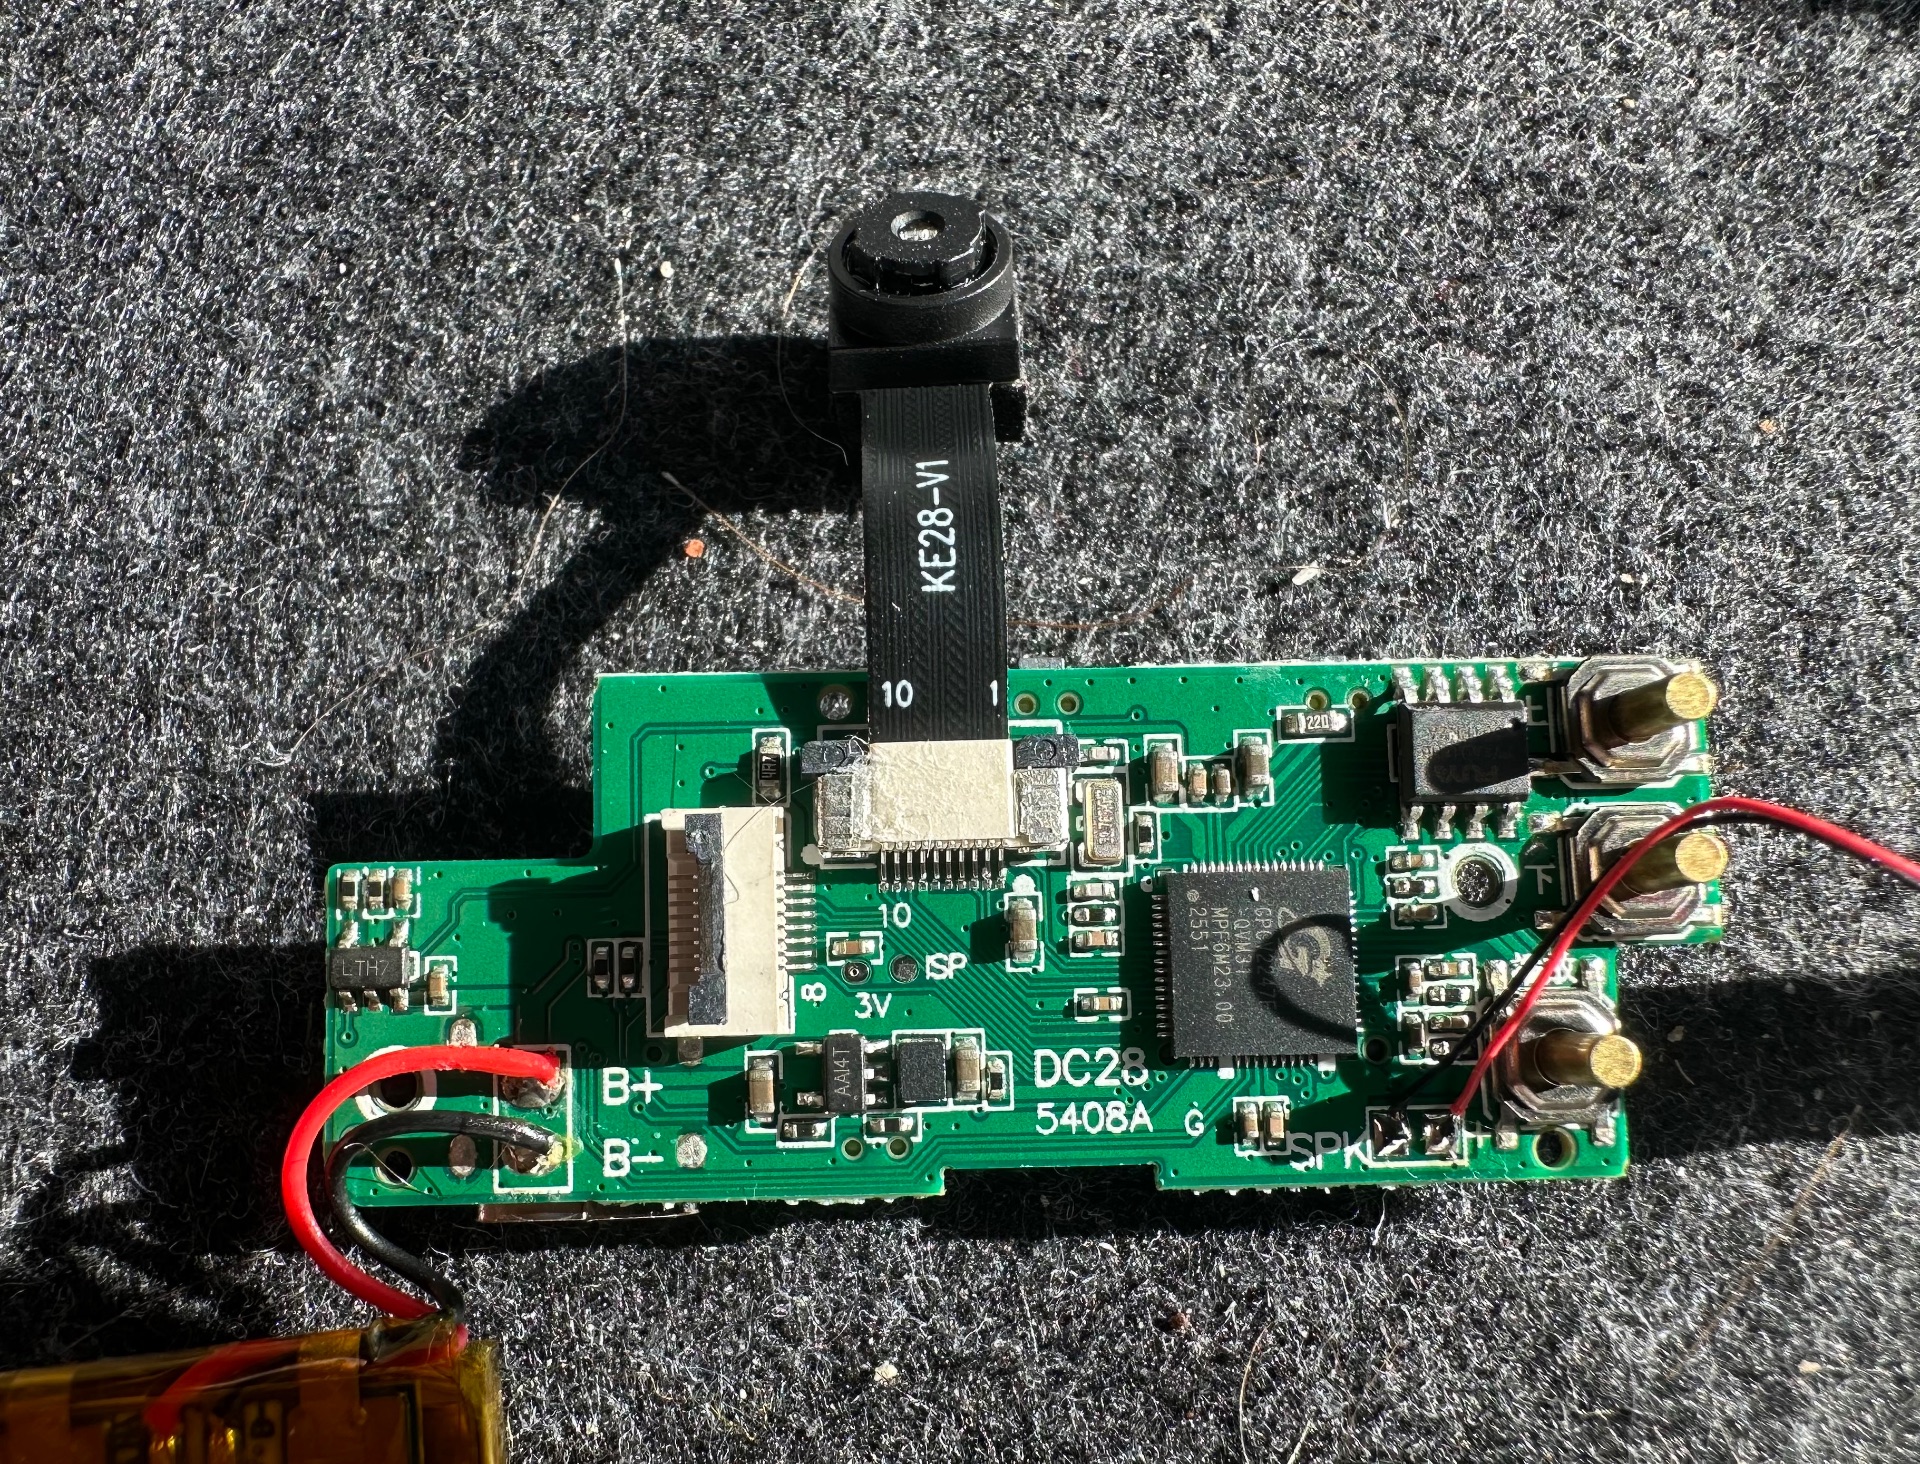
I’ve only just started exploring, but the two important chips here are:

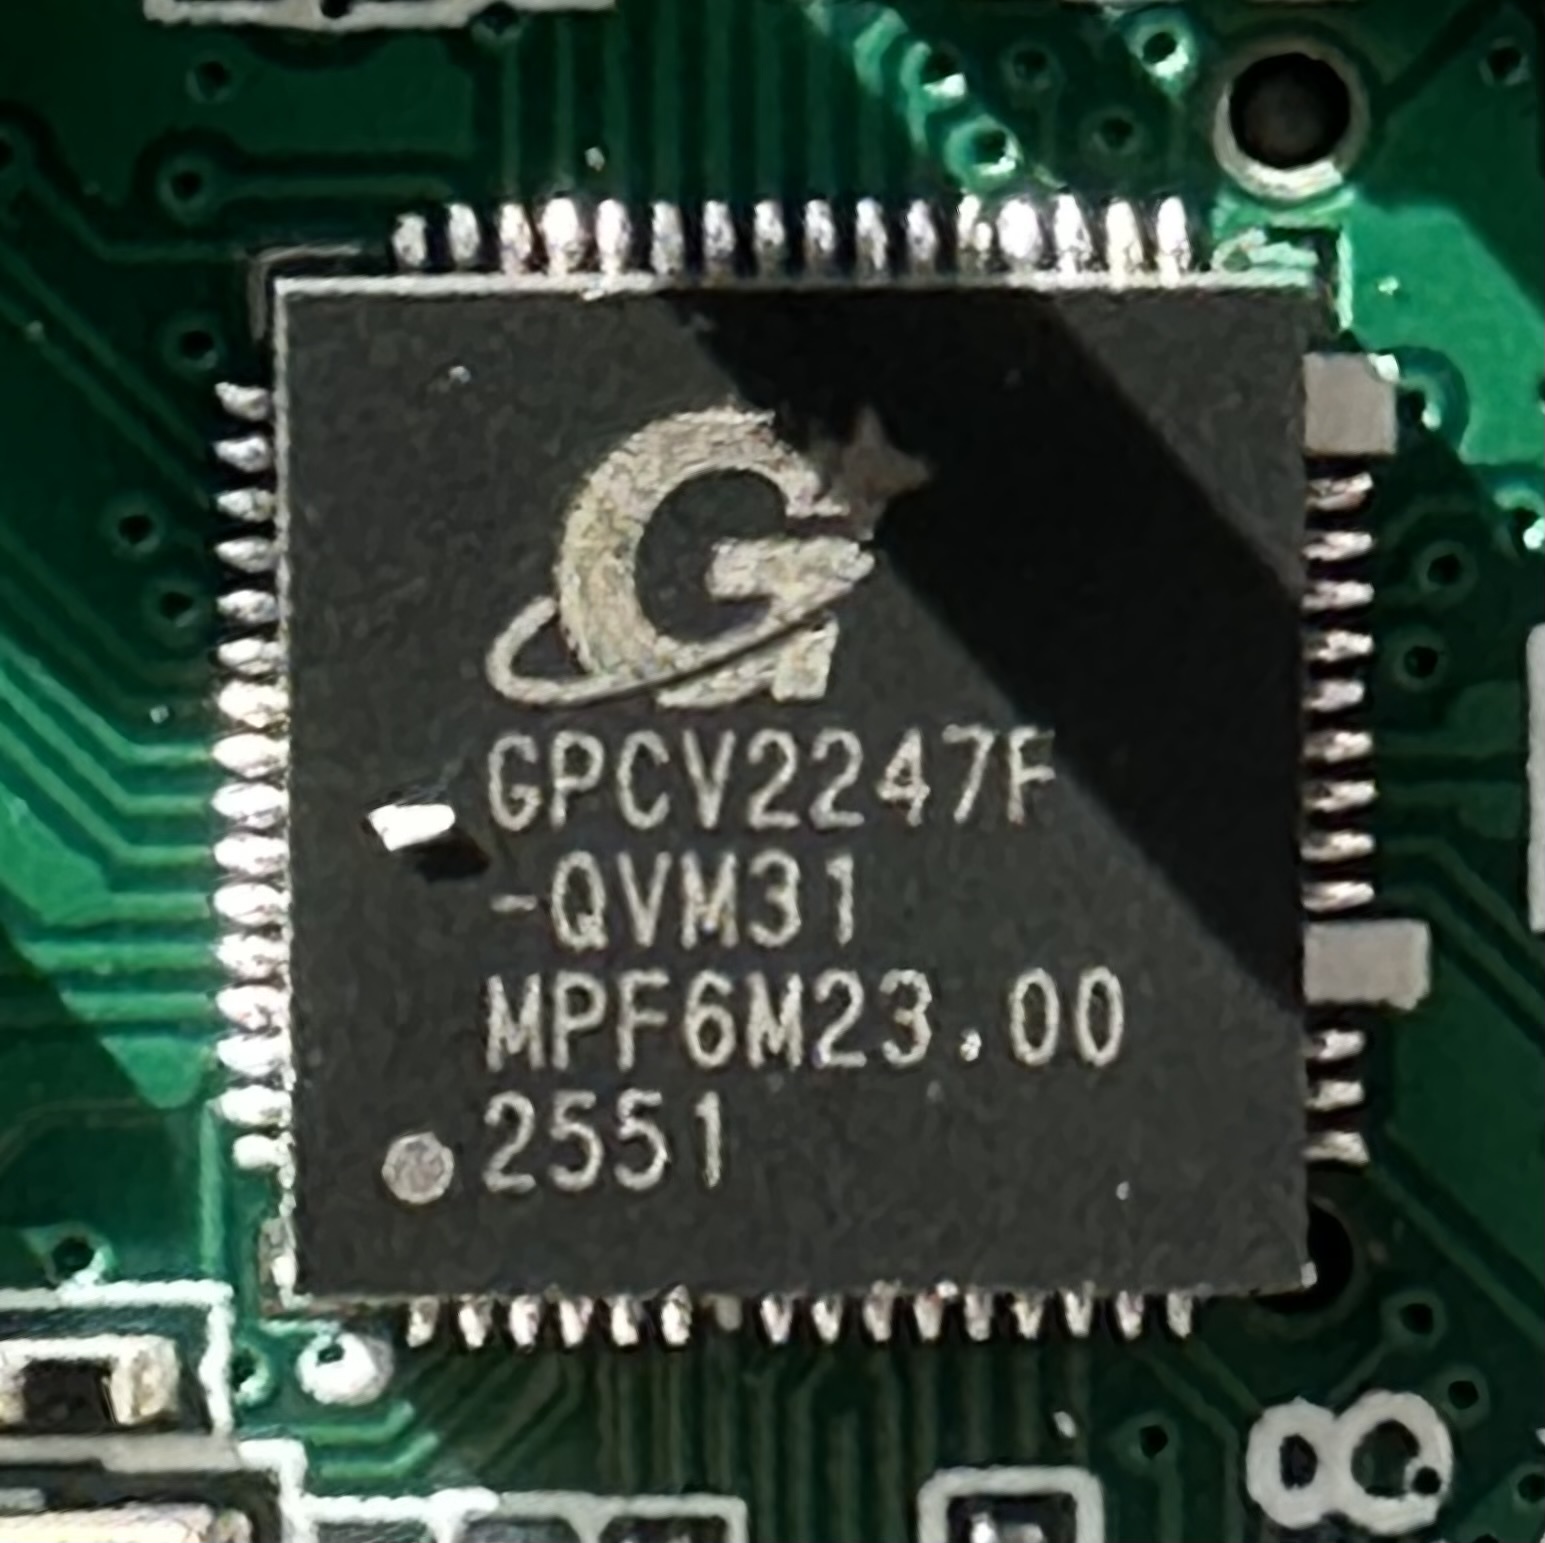
The GPCV2247F, a photo capture, image processing, jpeg/motion jpeg encoding, SD card writing, USB managing behemoth that basically does all the “taking a photograph” work.

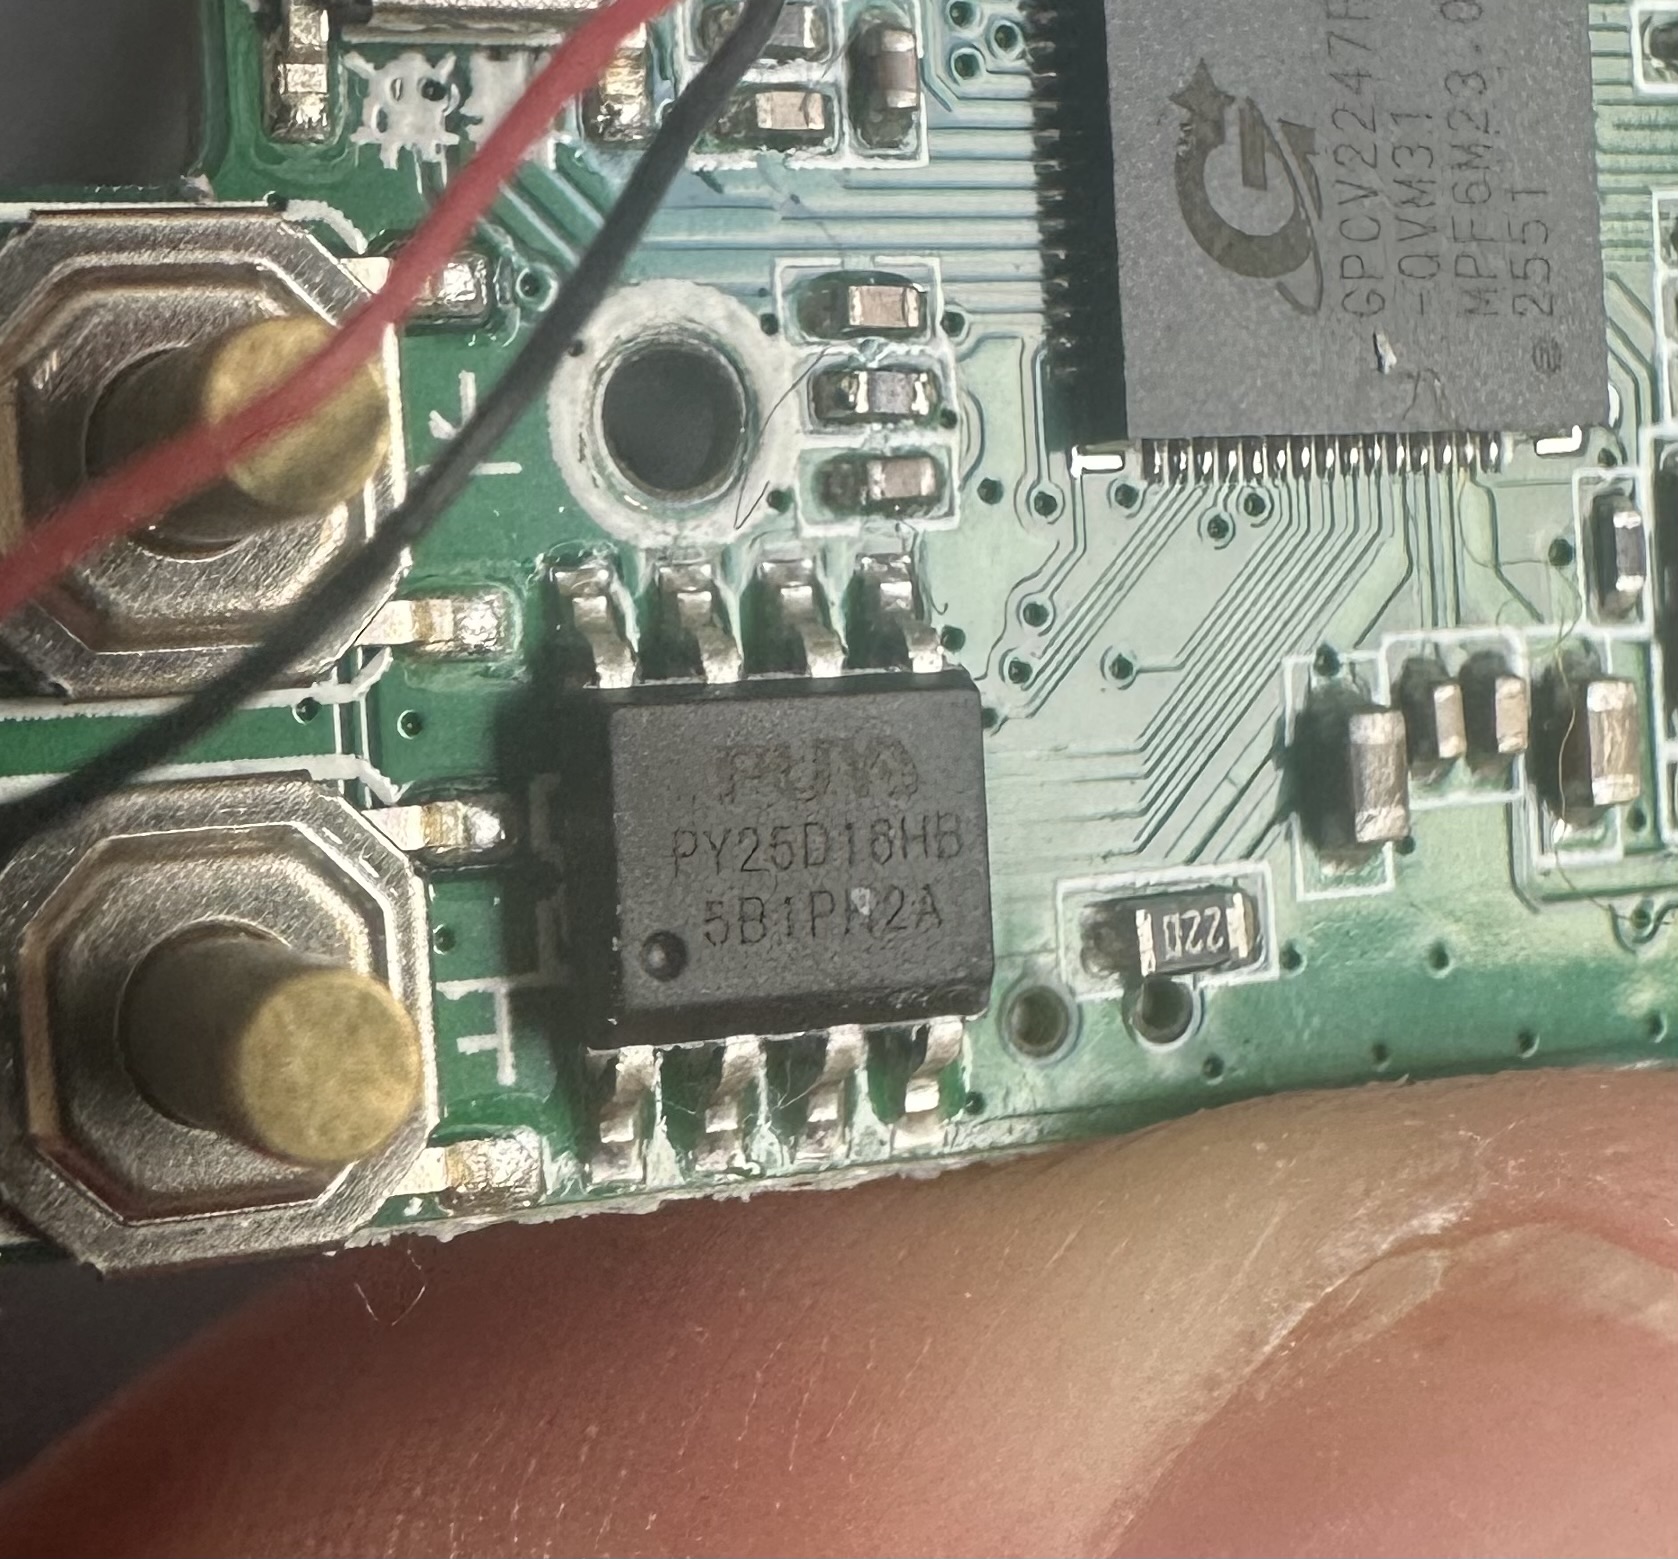
A PY25D16HB flash memory chip, which (I believe!) holds the firmware for operating the screen. I intend to dump the flash from here later this week. This may be hard… look how small it is compared to the edge of my thumb…

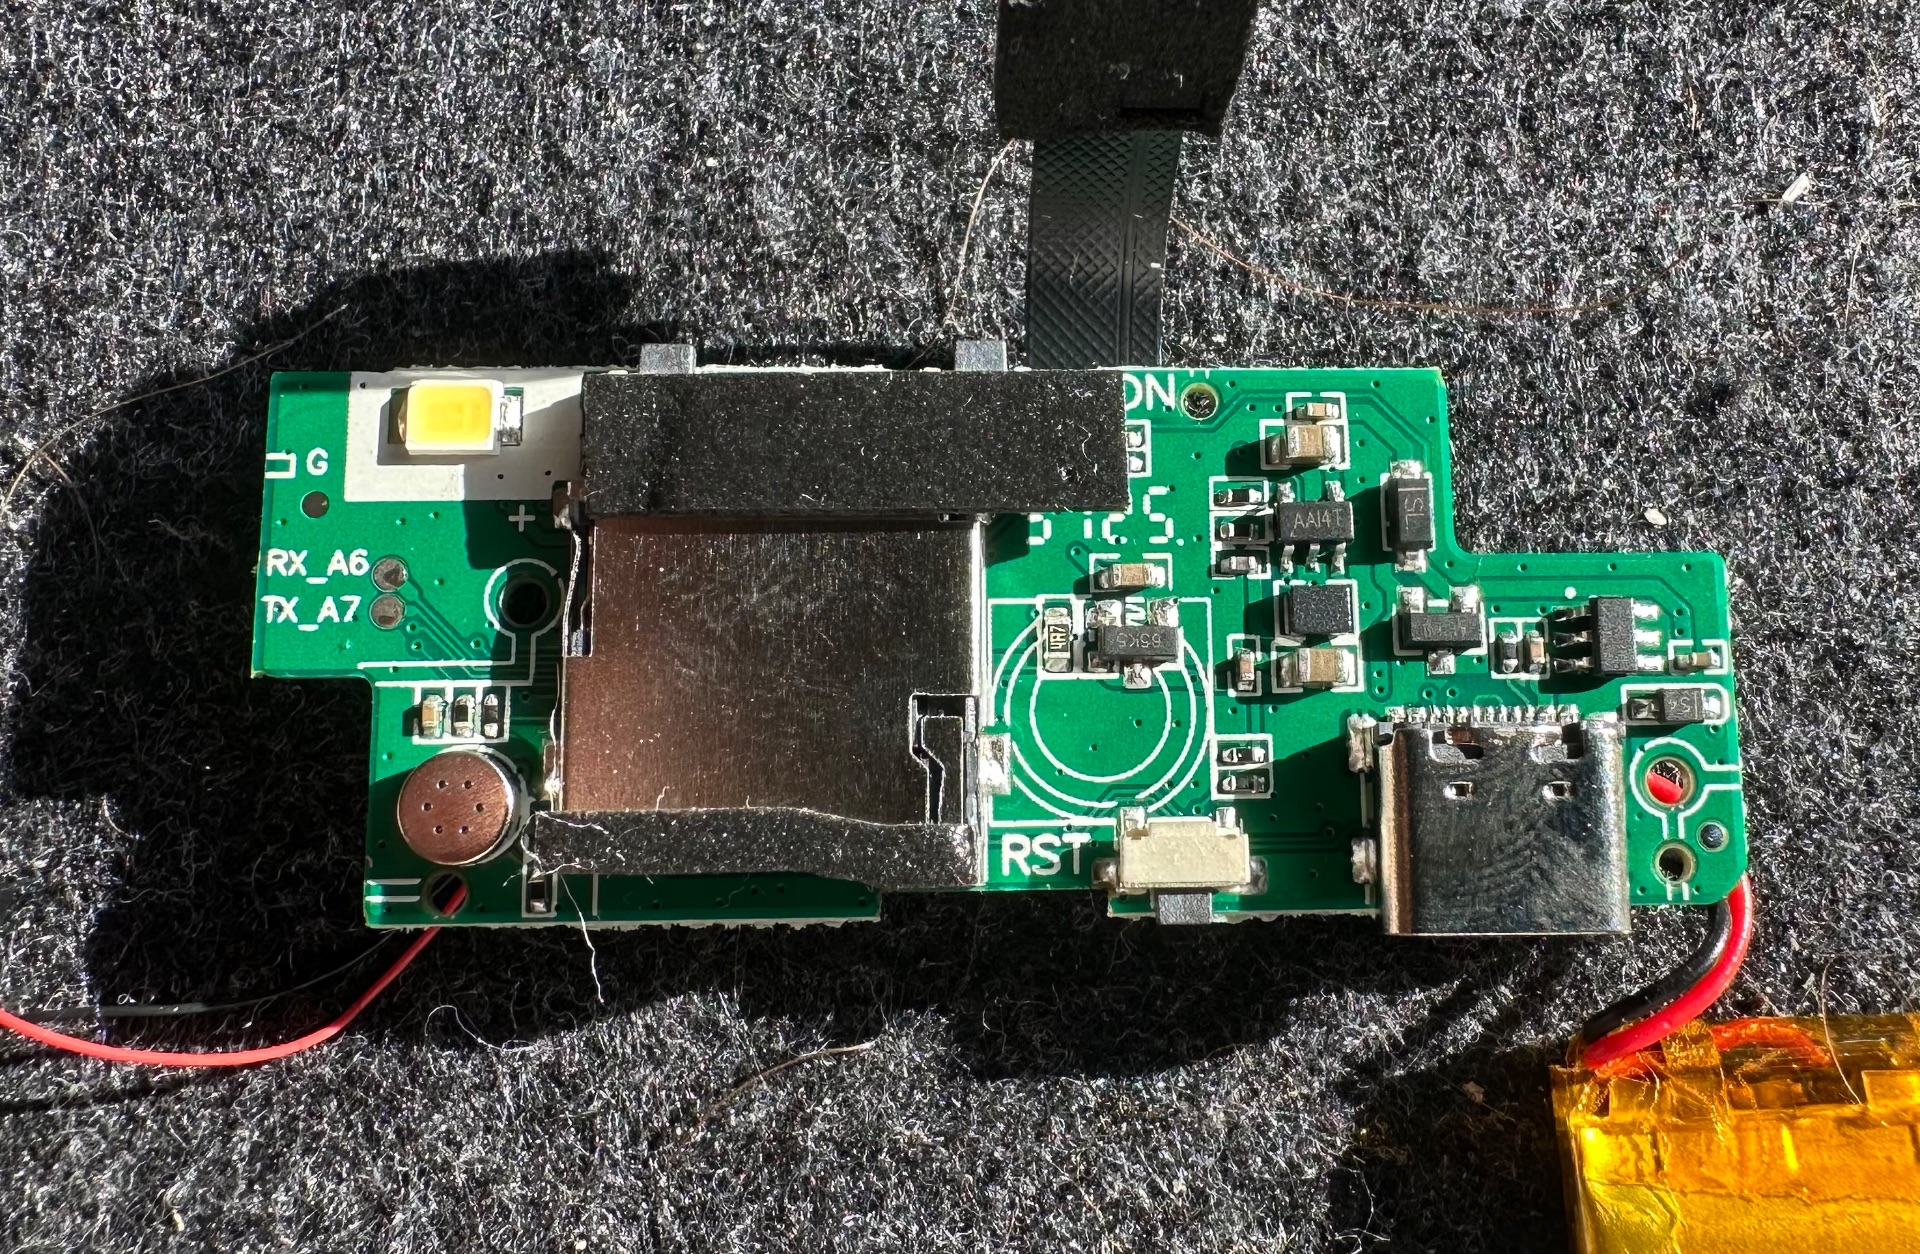
The front of the board has less going on (look at the size of that microSD card reader!) — just some power management, the flash and the USB socket.
That’s all for now—I’ll write more (here!) once I’ve pulled the software apart as thoroughly as I have the hardware!